Inspiration came knocking at my door with a two day fusing workshop with Marne Ryan. She hand-fabricates each of her designs by fusing sterling silver patterns to a base sheet. Much of her work uses 24 karat gold and sterling silver. Photos of her work can be seen at www.MarneRyan.com.
Marne generously shared her 30 years of knowledge, showing numerous demonstrations of fusing sterling silver in different patterns and the specifics on how each pattern is created. The variety of patterns are limited only by one's imagination! There is a definite technique to fusing- the intensity of the flame, how closely the flame is held to the metal, waiting for the flash of melting metal. The sterling silver used in this project is made by Hagstoz & Sons. Marne says sterling silver is not created equal. She has tried other manufacturer's sterling silver with poor results.
After the demonstration, we were given our sterling silver metal packets to create our own fused patterns. I was so excited, imagining richly textured patterns created from wire and pieces of textured sheet metal.
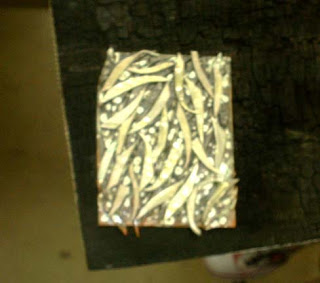
The photo to the left shows the preparation of pieces for fusing. This pattern will look like bamboo leaves. Each piece is folded in half to give the piece depth and is filled edge to edge.
More pieces are added to the first fused layer. Once all fusing is completed, the sheet is flattened in the rolling mill. Now, the sheet is ready to create your design.
Now, what to make with my metal packet? Marne's silver and gold bangles are so attractive, I decided I needed to have one. A pattern with a smaller design would look better on a 1/4" wide bangle bracelet. So I chose a checkerboard pattern design made with 1/2" x 1" pieces of sheet metal that are folded in half, then rolled through the wire portion of the rolling mill. These pieces are opened and flattened, then placed on a fluxed 2" x 3" silver sheet for fusing. The first time you fuse, don't forget to breathe. In the space of a couple of minutes I had to judge flame size, the distance of the flame to the metal, remember not to flick the torch when I saw the metal melting, and watch for the flash of metal fusing. Wow, what a rush!

This is what the fused sheet looks like.
Fusing is counter-intuitive to soldering. Your mind is screaming "pull the flame away" when you see the metal melting. But to fuse, a steady flame is required on the area until the flash of melting metal is visible before moving on to the next area. Once the piece is fused, pickle, rinse and dry, followed by flattening in the rolling mill.
To make the bangle, three 1/4" wide x 3" long patterned pieces are cut from the patterned sheet and placed on a 1/4" wide base strip. The patterned sheet is not thick enough alone, so the pieces are soldered to a supporting sheet. The ends are overlapped, one end over the other, then sweat soldered to the base strip. The piece is pickled, rinsed and dried, then formed into an oval bangle. The ends are soldered together, then it is formed on a bracelet mandrel. Final steps include filing, sanding, polishing, and patina. I was able to achieve a golden patina to simulate the 24 karat gold Marne uses in her designs.
I am elated with what I accomplished during this class. My bangle looks like a million bucks! This technique produces such wonderful textured patterns that are to die for. I see earrings, pendants, and more bangles in my future! It's not difficult, just requires nerves of steel until you get used to the technique. Stay tuned for my own original fused designs, coming soon!
Many thanks to Marne Ryan for a great workshop. You can see her in person at the Contemporary Crafts Market on November 5-7 at the Santa Monica Civic Auditorium.


This was a fun project. Watching the metal melt/fuse is fascinating. Please post your comments on projects/techniques that you enjoy.
ReplyDeletegreat post!! lots of good info. thanks for sharing. i want to see a photo of the finished bangle ;-)
ReplyDeleteThanks Lisa for posting this review of Marne Ryan's demonstration. It was a great class, I enjoyed it immensely and can't wait to do some more fusing.
ReplyDelete